Conversor de Marcadores
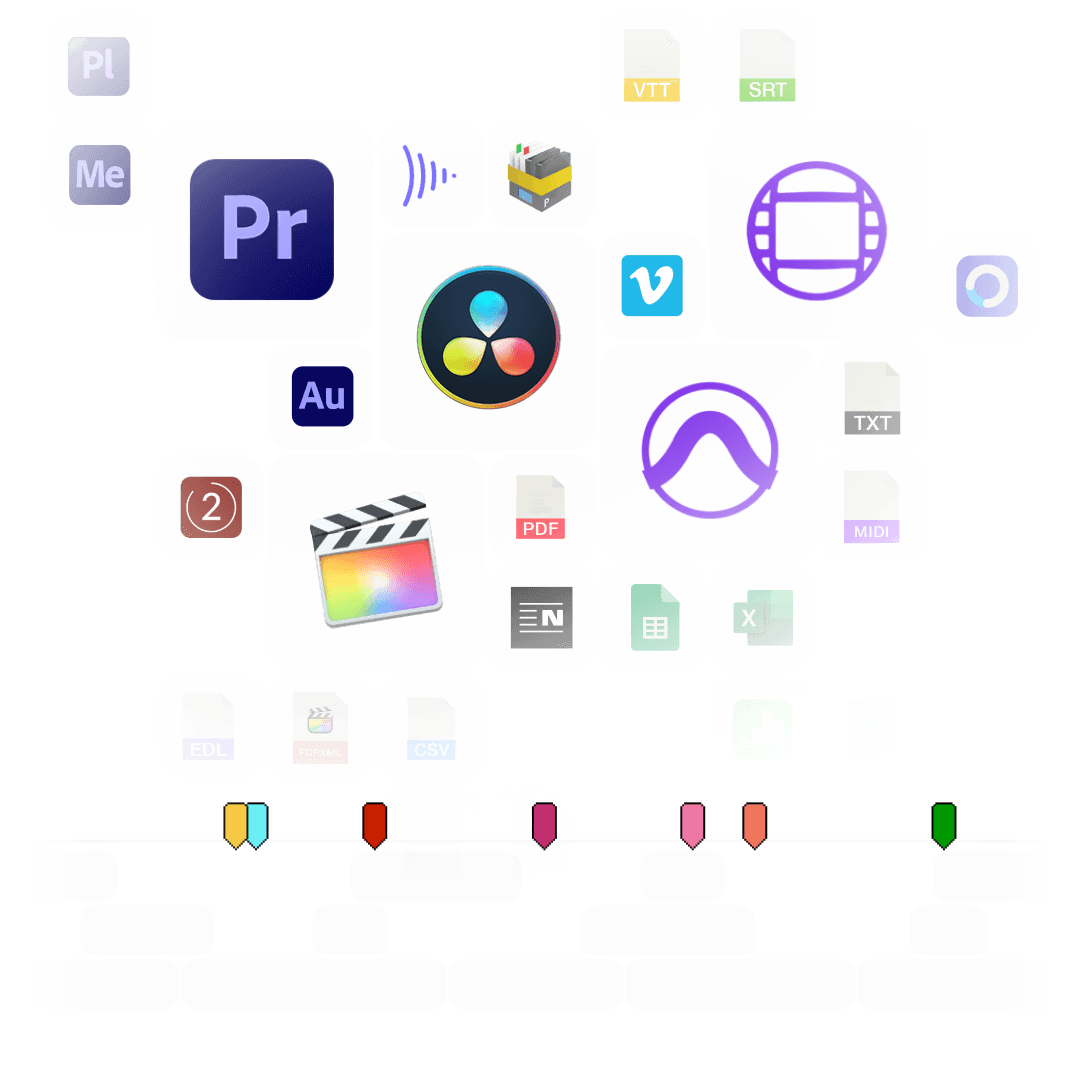
Converte o teu Timeline Marker de e para Adobe Premiere Pro, DaVinci Resolve, Frame.io, SubRip Subtitles, CSV, PDF e mais.
Espreita a FAQ abaixo, se tiveres alguma dúvida.
em curso...
Cores de Marcador
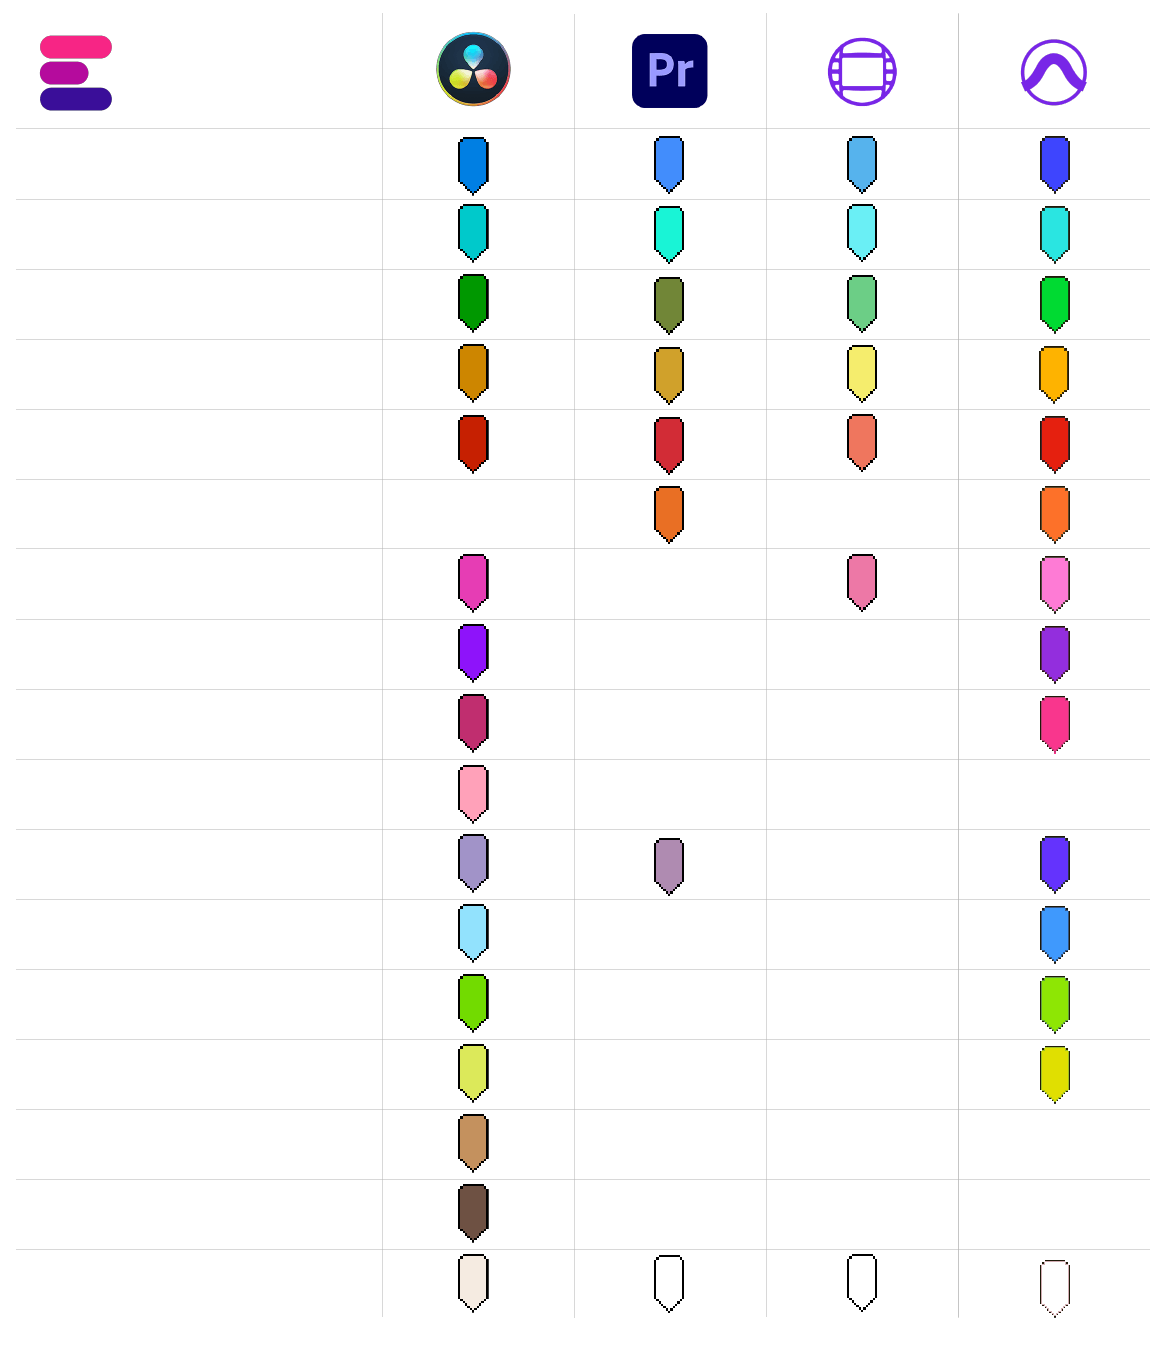
Não há regras iguais para as cores dos marcadores nos diferentes softwares. Cada programa usa tons de cores diferentes e, em parte, também nomes de cores distintos. O conversor de marcadores da EditingTools.io tenta atribuir a cor do marcador ao grupo de cores mais próximo.
Com este gráfico, tens uma visão geral das cores que são reconhecidas e como elas são interpretadas.
Cor por defeito do marcador
Pode definir uma cor de marcador predefinida para ser utilizada, se não houver uma cor definida ou desconhecida no ficheiro de importação.
Marcadores de filtro
Esta função permite-te filtrar os marcadores e especificar que apenas determinados marcadores são convertidos. Se quiseres filtrar mais do que uma cor, utiliza a função "alterar cores do marcador".
Deslocar todos os marcadores (Offset)
Usa esta função para deslocar todos os marcadores num determinado intervalo. Podes introduzir um valor positivo ou negativo.
Incluir marcadores de clipes
Ativa esta opção para incluir marcadores de clipes do Premiere Pro XML e FCP7 XML. Esta opção também adicionará a identificação da pista, nome do clip, fonte, timecode da fonte de entrada, e timecode da fonte de saída para exportações CSV.
Definir nomes de marcadores baseados em cores
Substitui os nomes dos marcadores e atribui um título de marcador separado para cada cor. Por exemplo, podes nomear automaticamente todos os marcadores amarelos como "VFX" e todos os marcadores azuis como "ADR" sem perder a descrição.
Mudar as cores do marcador
Usa esta função para reatribuir as cores dos marcadores. Só tens de definir as novas cores dos marcadores através dos campos de seleção. Podes também utilizar esta opção como um filtro de cor avançado.
Unir vários ficheiros de marcadores
Podes carregar até 20 ficheiros de marcadores diferentes ao mesmo tempo e juntá-los num único ficheiro de marcador. Lembra-te de que estes ficheiros têm de estar todos no mesmo formato.
Início de Sequência / Início de Sessão
Introduz o Timecode de Início da tua sessão ou sequência de edição, caso uses algo que não seja 00:00:00:00. Isto é necessário, por exemplo, se converteres para Avid Pro Tools e Adobe Premiere Pro ou de Frame.io ou Pix para qualquer outro formato.
Converter videoclipes em marcadores
Podes selecionar um ficheiro EDL e transformar cada clip num marcador. Isto é útil para marcar todos os planos VFX de uma só vez, por exemplo. Coloca-os numa pista separada num programa de edição e exporta um EDL apenas com esta pista de vídeo. Define o campo "Converter de" para "Converter clipes de EDL para marcadores".

Formatos suportados
The following applications and file formats are supported among others. See our instructions for each format below.
| Editing Software | Adobe Premiere Pro, Adobe Audition, Apple Final Cut Pro, Avid Media Composer, Avid Pro Tools, DaVinci Resolve |
|---|---|
| Review Tools | Frame.io, Vimeo Review, Pix Systems, NoteTracks Pro, Krock.io |
| Subtitles | SRT, VTT, SBV, (more in our Subtitle Tool) |
| Docs & Sheets | PDF, CSV, Text, Excel, Google Sheets, Apple Numbers, OpenDocument Spreadsheet, TSV |
| Other Tools | oTranscribe, Adobe Prelude Live Logger |
How to import timeline markers?
Go to "File -> Import" and select the xml file.
How to export timeline markers?
Select the sequence in your project tab.
In menu, got to: "File -> Export -> Final Cut Pro XML"
Select "Final Cut Pro XML" and hit ok.
You can use Adobe Prelude Live Logger app to create live timecode notes and tags which you can export and convert in this tool into other marker formats.
How to import timeline markers?
Go to: "Tools -> Marker"
Right Click: Import Markers
Select the generated "xml" or "txt" file from EditingTools.io.
How to export timeline markers?
Go to: "Tools -> Marker"
Right Click: "Export Markers as XML" OR "Export Markers as Text"
Can I set marker durations to one frame?
Select "Cange marker duration" from the "more options" menu.
Can I overwrite the marker name in Avid Media Composer?
Yes, you can overwrite the marker name within the marker description field in Media Composer. Simple use "|" to seperate the name and the description in Media Composer. When you import the markers to EditingTools.io, it will be splitted into name and description.
What else should I know?
Avid Media Composer might fail importing markers if they overlap.
There are 3 different ways to bring markers into Avid Pro Tools. The most suitable of these 3 is the Pro Tools PTX format.
| PTX Session Data | MIDI File | EDL File | |
|---|---|---|---|
| Marker colors | Yes | No | No real markers but clips with the marker name as clip name. |
| Individual Session Timecode Start | Yes | Yes | Not relevant |
| Adjustable audio pull rate | Yes | No | Not relevant |
| Adjustable sample rate | Yes | No | Not relevant |
| Import new markers at a later time | Yes | No. Pro Tools allows only one Midi track with markers per session. | Yes |
How to import PTX markers into Pro Tools?
In ProTools, go to "File > Import > Session Data". Select and open the generated ".ptx" file. In the "Import Session Data" window, make sure the "Ruler Markers / Memory Locators" box in the lower "Session Data" panel is checked. Press "OK" and your markers will be imported.
How to import MIDI markers into Pro Tools?
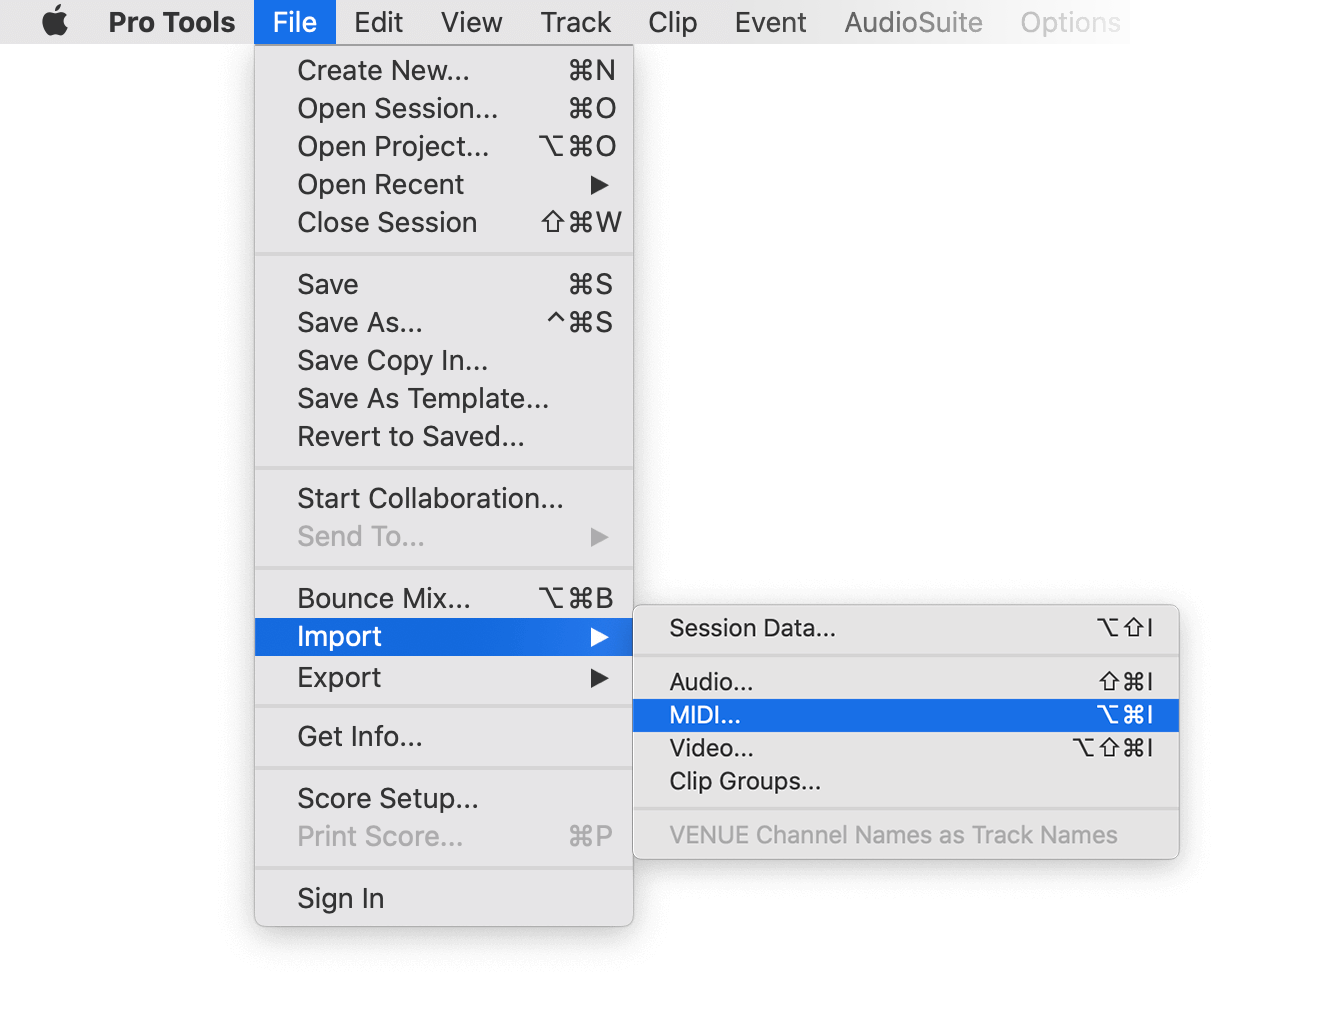
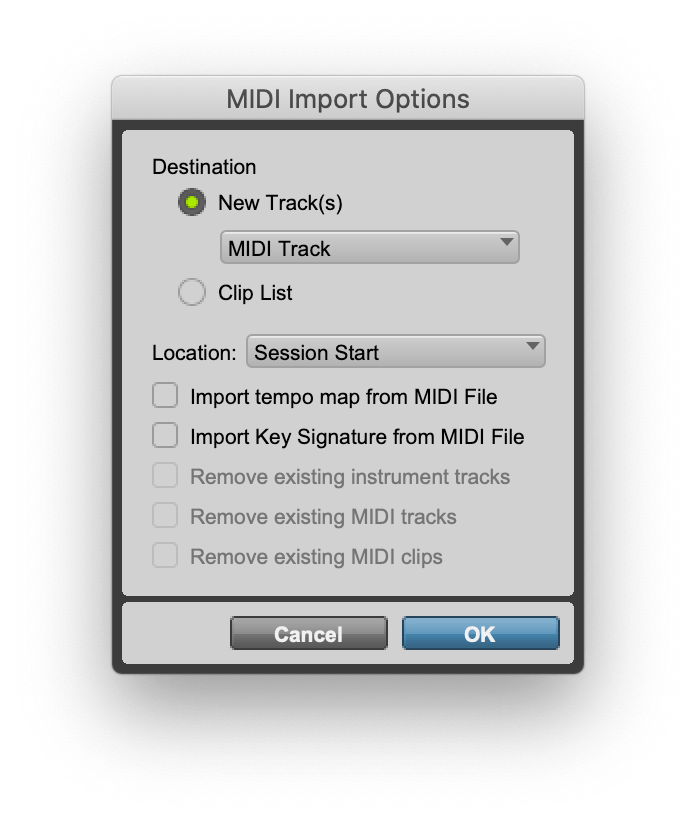
Under "File -> Import -> Midi" you can import the generated marker file into Pro Tools. Select the file and then "Add Midi Track". Attention, if there is already a midi track with markers you have to remove them first. If your session is not at 00:00:00:00 the imported markers have an offset. Therefore, when converting, specify your timeline start timecode from your Pro Tools session (you can find this option under "more Options" in the form above). Often this is 01:00:00:00.
How do I export markers from Pro Tools?
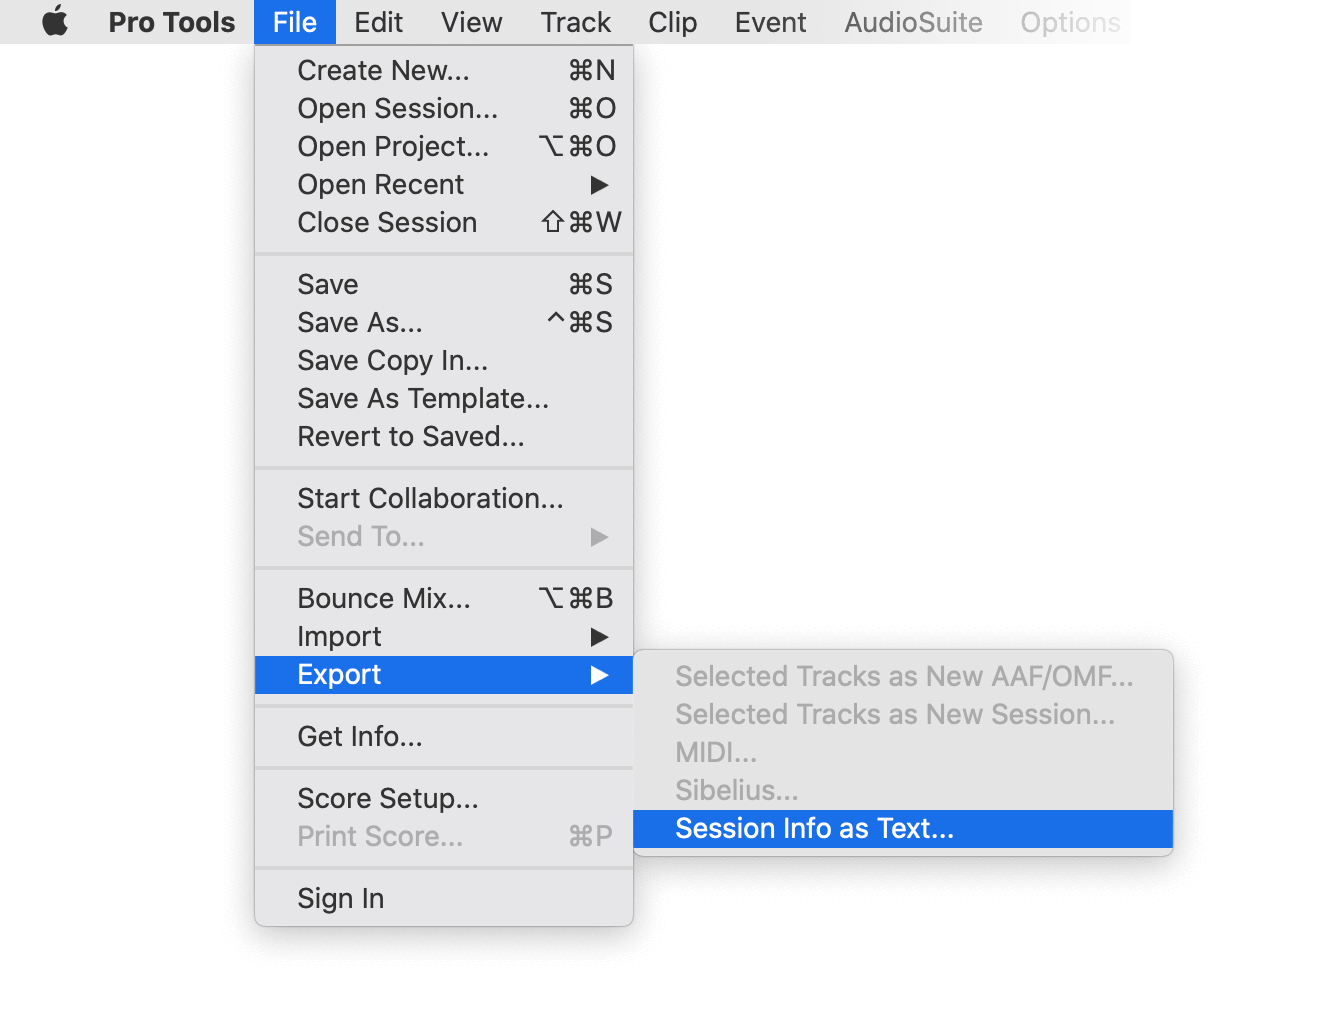
Under "File -> Export -> Session Info as text" you can export the markers from Pro Tools.
How to import timeline markers?
1. Create a new timeline or open a timeline in your project
2. Make a right click on the sequence timeline in your media tab. It will open an popup.
3. Navigate to: Timelines > Import > Timeline Markers from EDL
3. Select the edl marker file for Resolve and the markers will be loaded.
- In case you don’t see any markers, make sure they are in the right timecode area and try to zoom out of your timeline.
- If you can not find the option „Timeline Markers from EDL“ make sure you selected a sequence in your media tab.
- Resolve does not support special chars in markers.
How to export Timeline Markers?
1. Select the sequence in your media tab.
2. Make a right click on the sequence timeline in your media tab. It will open an popup.
3. Navigate to: "Timeline > Export > Timeline Markers to EDL (.edl)"
How to export Clip Markers?
1. Select the sequence in your media tab.
2. Make a right click on the sequence timeline in your media tab. It will open an popup.
3. Navigate to: "Timeline > Export > Edit Index (.csv)"
How do I export markers from Pix?
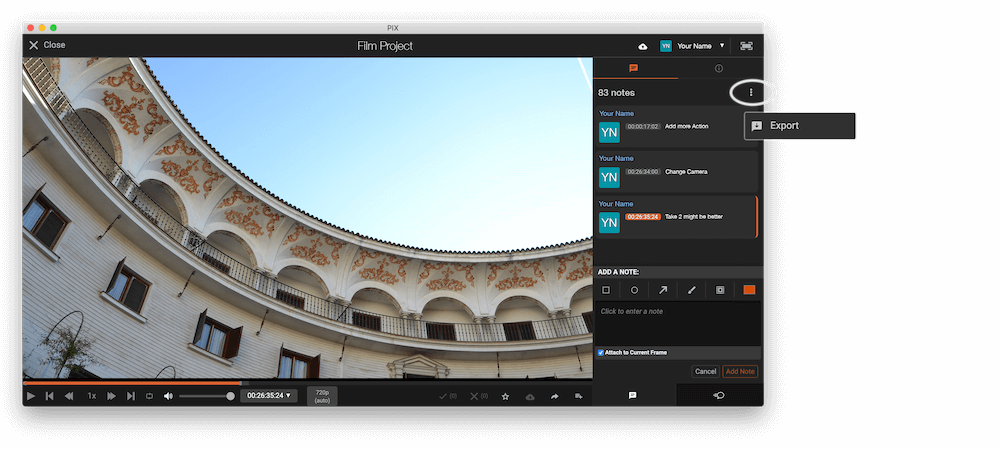
Open the comments panel on the right side in Pix. Press the three dots and select "Export". You can then download a CSV file from Pix that you can import into EditingTools.io. The timecode in Pix starts with 00:00:00:00 for each clip, so you may need to use the offset function on EditingTools.io to sync it with you timeline or move it manually in your editing software.
Export markers from frame.io in marker menu "Download as File" > "CSV".
Export review notes from your project on vimeo.com as "CSV". Select "Vimeo Review" in the tool as "from" value.
You can use this tool to convert markers to YouTube Chapter Markers for the video description. Select "Convert to" to "YouTube Chapter Markers (.txt)". Open the generated .txt file and paste its contents into your video description.
To export markers and comments from NOTETRACKS Pro, click the Download button in your active session and select "NoteTracks.com > Audition Markers (.csv)". In our Marker Tool, select Convert from "NoteTracks.com > Audition Markers (.csv)".
NOTETRACKS Pro is an online review platform for audio creators. Learn more about it on notetracks.com.
To export comments from Krock.io, select a video and open the menu via the three dot icon. Select "Export comments to csv" to export the comments. In the marker converter select "Krock.io" as "convert from" value.
Krock.io is an online media content review tool. Learn more about it on Krock.io.
Convert comments from E-Mail, Word, Pages, Slack, Chats or any other clean Text Source into markers using the Textfield option. Simply copy and paste the comments into the textfield. Makes sure the comments follow the basic rules to be recognized correctly:
- Each comment needs to be in a new line
- Each line needs to start with a timecode
Example Input:
0:32 Please add Music

1min Intro

1:55min Add Cut

17.6min VFX Shot?

21:12 Add Detail Shot

23.1 VFX

75:20 Credits?
Which time formats are recognized?
1:32, 01:32, 00:01:32, 1.32, 01.32, 1:32min will be converted to TC 00:01:32:0075:20, 75:20min, 75.2 will be converted to TC 01:15:20:00
How do I import markers into Google Sheets?
Open Google Sheets and go to "File -> Import". Upload the generated CSV file and press "Import Data" to generate a Sheet with all markers.

How do I export markers from Google Sheets?
Go to "File -> Download -> Comma-separated values". Make sure your Google Sheets matches the csv rules. The first line needs to contain at least the columns "Timecode In" and "Name" or "Comment". If you are not sure about the file headers, download the CSV demo file here: demo_marker_file.csv. Read more about the headers in the CSV Tab.

Markers can be exported as XLSX or XLS files for Microsoft Excel.
Markers can be exported as ODS (OpenDocument Spreadsheet) file for Open Office Calc.
How do I import markers into Apple Numbers?
Open Numbers and go to "File -> Open". Simply open the CSV file.

How do I export markers from Apple Numbers?
Go to "File -> Export -> CSV". Make sure your file matches the csv rules. The first line needs to contain at least the columns "Timecode In" and "Name" OR "Comment". If you are not sure about the file headers, download the CSV demo file here: demo_marker_file.csv. Read more about the headers in the CSV Tab.

Can I write my own CSV File?
Yes. Just take a look at our demo files to match the rules for correct interpretation. The marker converter accepts comma-, semicolon- and tab-separated files.
Download the CSV demo file here: demo_marker_file.csv.
Marker CSV Preset in Google Sheets: Open in Google Drive.
- Timecode In
- Timecode Out
- Name
- Comment
- Color
blue, cyan, green, yellow, red, orange, magenta, purple, fuchsia, rose, sky, mint, lemon, sand, cocoa, white, blackHow do I convert subtitles into markers?
Simply select your subtitle file.
Can I convert markers into subtitles?
Yes, it is possible. Have a look at our Subtitle Tool. There you can convert markers into subtitles with a lot of options like "Min. Subtitle Duration" and many more: Subtitle Tool & Converter
To export a PDF, select pdf as output format.
You can use otranscribe.com to generate your markers from any audio or video file.
To export the markers go to "Download Transcript as" and download your script as "oTranscripe format (.otr)".
Ambient's NanoLockit is a great way to log takes on set. The log files (.markers) can be converted to any other format using this marker converter.
Learn more about the NanoLockit on ambient.de/collections/nanolockit
Get more with Pro
Our free marker tool offers a huge amount of features to convert and modify files. However, there are some limitations on the free tier that require a PRO subscription to unlock.
Check out all Pro Features| Free | Pro Users |
|---|---|
| Fair Use conversion limit | No conversion limit |
| Files with up to 1200 markers | No length limit |
| No file encryption | File encryption |
Tags
Converter CSV EDL JSON MIDI PDF PTX SBV SRT TXT VTT XML ProTools - Session Info as Text (.txt) Adobe Premiere Pro Avid Media Composer Avid Pro Tools DaVinci Resolve Final Cut Pro Frame.io